Flask & Stripe - Open-Source Mini eCommerce
Open-source mini eCommerce project that loads the products from JSON files saved in the templates directory (no database required) - Bootstrap 5 design is used for styling.

Hello! This article presents a Mini eCommerce project powered by Flask and Stripe. The sources can be found on GitHub and the permissive MIT License allows you to copy/incorporate the code into other projects or simply use it as it is.
🚀 PROMO
In case you're a junior developer or know one, this PROMO Bundle crafted, and Discounted with 85% by Creative-Tim might be useful. The package includes a rock-solid collection of premium assets (Kits & Dashboards) that can be used to build eye-catching portfolios and web apps in no time.
👉 Junior PROMO Bundle - 24 PREMIUM Kits & Designer Files

For newcomers, Flask is a leading backend framework actively supported and versioned and Stripe is a popular payments processor. Thanks for Reading!
- 👉 Flask & Stripe
Mini eCommerce- source code - 👉 Flask & Stripe eCommerce - youtube presentation
- 🚀 The support page (just in case)
The project has no database, or authentication, and loads the product definitions from separate JSON files using minimal routing logic. Once the product information is loaded the pages are generated on top of a modern Bootstrap 5 design.
The fastest way to get the project up & running locally is to follow up on this simple setup:
👉 Step #1 - Clone the project from the public repository:
$ git clone https://github.com/app-generator/sample-flask-stripe.git
$ cd sample-flask-stripe
👉 Step #2 - Add STRIPE secrets in Dockerfile # Stripe Secrets
ENV STRIPE_SECRET_KEY <YOUR_STRIPE_SECRET_KEY>
ENV STRIPE_PUBLISHABLE_KEY <YOUR_STRIPE_PUBLISHABLE_KEY>Stripe secrets are provided by the Stripe platform.
👉 Step #3 - Start the APP in Docker $ docker-compose up --build Visit http://localhost:5085 in your browser. The app should be up & running.

✨ How it Works
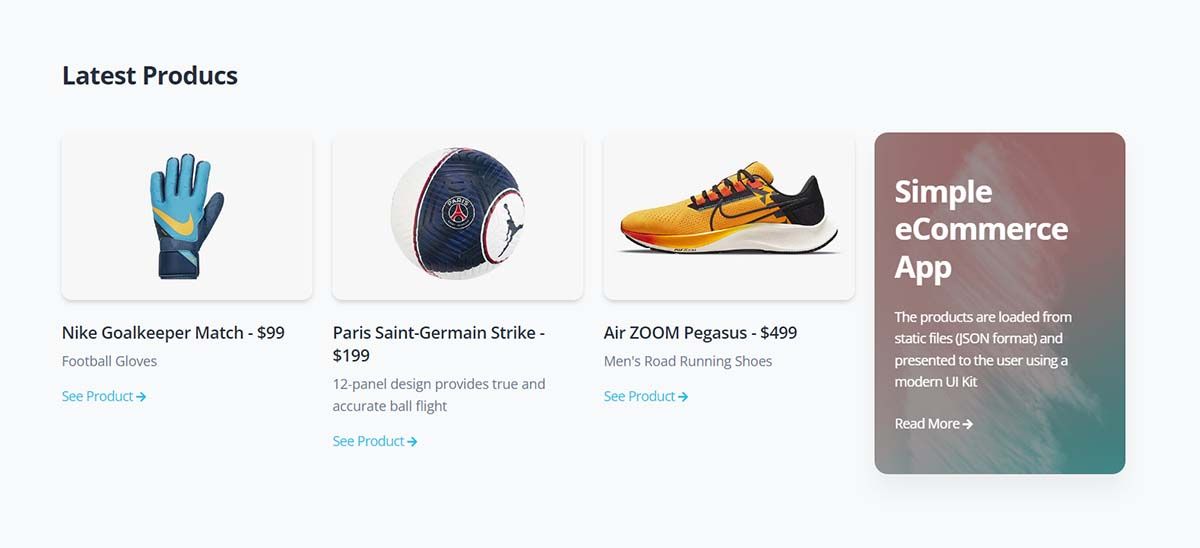
The project loads a minimal configuration from the .env file and builds the pages after the templates/products directory is scanned. The products index contains all products plus a featured product presented at top of the page.
The above image is generated from this simple structure saved on the disk:

The definition for each product is a minimal JSON file. Here is the information that defines the featured product:
{
    "name": "Nike Dynamo Go FlyEase",
    "price": 49,
    "currency": "usd",
    "info": "Baby/Toddler Easy On/Off Shoes",
    "short_description": "A workhorse built to help power ... (truncated)",
    "full_description": "Easy, snug and built for any-time play the Nike Dynamo Go FlyEase ... (truncated)."
}Using this minimal information, the app will generate the top section of the products page:

✨ How to define a new product
A new product can be defined in less than 1 minute using the guidelines presented in the README file:
- Navigate to app/templates/products directory
- Create a new JSON file from an existing one
- Edit the product: name, price, full description
- Create Media Files: navigate to app/static/products
- Create a directory using the same name as for
JSONfile - Create
card.jpg: 500 x 335 (pixels) - Create
cover.jpg: 2100 x 1400 (pixels)
At this point, if we refresh the HOMEpage the new product is ready to be used.
Here is a sample product page generated for Air ZOOM Pegasus, using assets loaded from here:

✨ Video Presentation
All the above points are presented step-by-step in a short video published on yTube. Here is the material transcript:
- ✅ Clone the project
- ✅ Start the app using Docker
- ✅ Access the pages, visualize the products
- ✅ Complete a purchase
- ✅ Cancel a purchase
- ✅ Start the project using a manual build
Thanks for reading!
